Learn how to build your own automatic water fountain with this fun and easy DIY project! Using readily available materials like a plastic bottle and a balloon, you can create a fascinating miniature fountain that demonstrates basic principles of physics. This project is perfect for kids and adults alike, offering a rewarding experience and a unique decorative piece. The instructions are simple to follow, making it accessible even for beginners with limited crafting experience. Prepare to be amazed by how easily you can transform everyday items into a captivating water feature.This project guides you through each step, from carefully creating the necessary holes in the bottle and cap, to securing the balloon reservoir and filling it with water. With a little patience and precision, you'll soon be enjoying the satisfying sight and sound of your self-made automatic water fountain. Get ready to experiment with different bottle sizes and balloon types to personalize your creation and discover the optimal water flow. Let's get started and build your very own mini water wonderland!
Read more: 5 Best Double-Sided Cat Brushes: Top Picks Reviewed
Preparing the Bottle
This project starts with a simple plastic bottle. The first step involves carefully creating holes, one near the bottom of the bottle and several in the cap. Precise placement is key for optimal water flow.
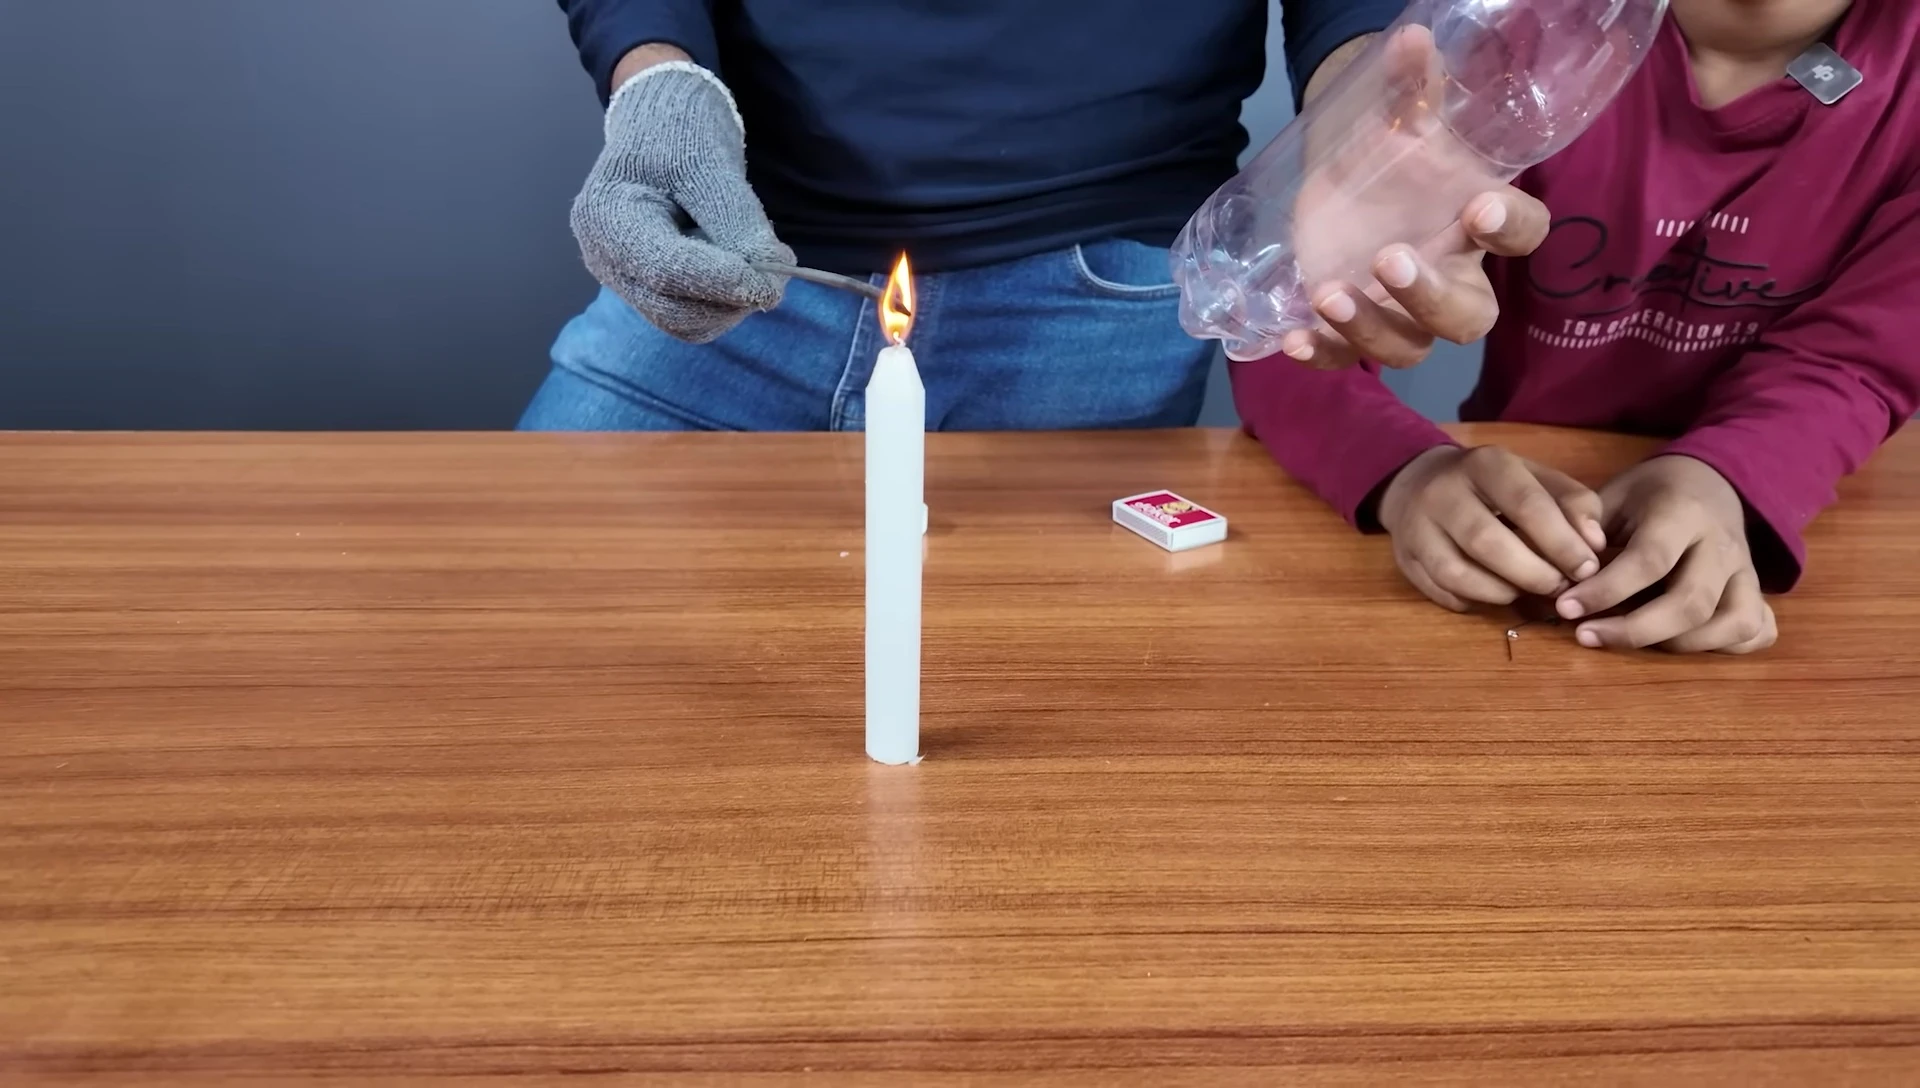
Using a heated object (like a candle), carefully melt holes into the bottle's base and the cap. Be cautious and patient during this process to avoid burning yourself or damaging the bottle.
Ensure the holes in the bottle cap are small enough to control the water flow but large enough to allow for a consistent stream. The hole at the bottom of the bottle determines the initial water release.
Attaching the Balloon
A balloon is crucial to this design; it acts as a reservoir and pressure regulator. Securely attach the balloon to the bottle cap, ensuring a tight seal to prevent air leaks.
The balloon's placement is important; it needs to be snugly fitted over the bottle cap and firmly secured. Any gaps could compromise the fountain's function.
Before adding water, ensure the balloon is properly positioned to prevent it from slipping or interfering with the water flow from the holes.
Adding Water and Testing
Fill the balloon with water, leaving some room for expansion as the water flows. A funnel can be very helpful during this step.
Once filled, carefully seal the bottle cap. The water should remain contained within the balloon until the mechanism is triggered.
The final step is to test the fountain. Carefully release the pressure from the bottle and watch the water flow.
Conclusion: A Successful DIY Project
This DIY automatic water fountain project is a fun and educational endeavor, demonstrating simple principles of physics in a creative way.
While requiring careful execution, the project is accessible and provides a satisfying result: a functional, self-made water fountain.
The success of the project hinges on creating the precise holes in both the bottle and the cap, ensuring a tight seal for the balloon, and careful filling of the balloon with water. The end result is a simple and functional homemade water fountain.