Keeping your feline friend healthy and happy involves more than just providing food, water, and cuddles. Regular claw maintenance is crucial for your cat's comfort and well-being, preventing painful overgrowth and potential injuries. Untrimmed claws can become dangerously embedded in furniture, carpets, or even your own skin, leading to discomfort for both you and your pet. Moreover, overgrown claws can affect your cat's posture and gait, causing unnecessary stress on their joints. Imagine the peace of mind knowing you're actively contributing to your cat's physical health and preventing potential problems before they arise.
This seemingly simple task can be daunting for some, but with the right approach and a little patience, trimming your cat's claws can become a stress-free experience for both of you. In this comprehensive guide, we'll walk you through a step-by-step process, providing helpful tips and tricks to make your cat's pawdicure a purrfect success. Let's get started on this essential aspect of feline care.
Preparation and Safety Guidelines
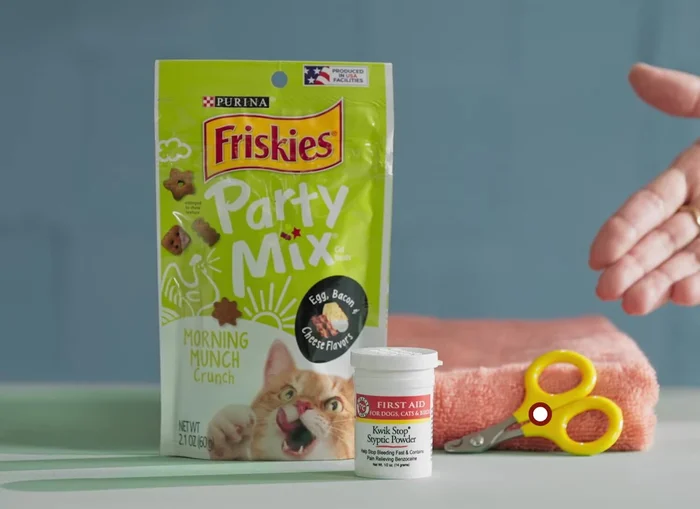
- Nail clipper or grinder
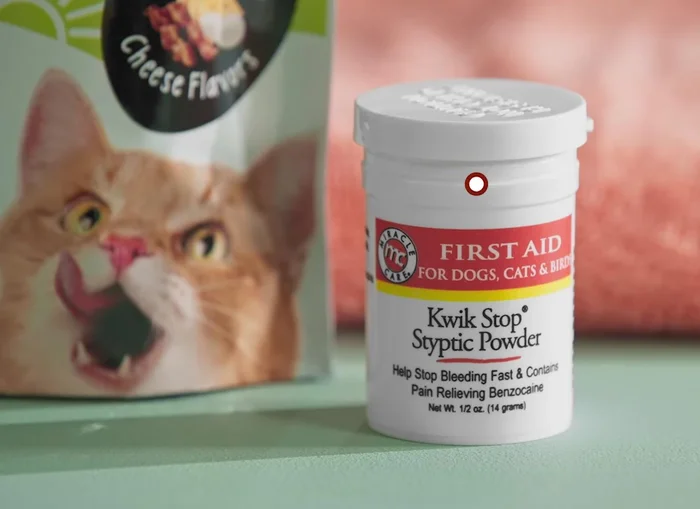
- Styptic powder
- Towel (optional)
- Treats
- Never force your cat. If they're stressed or resisting, stop and try again later. A struggling cat can easily get injured.
- Only trim the sharp, clear, hooked part of the claw (the quick). Cutting into the quick is painful and will cause bleeding.
- Have styptic powder or cornstarch on hand to stop bleeding if you accidentally cut the quick. If bleeding is profuse or you're unsure, consult a vet immediately.
Step-by-Step Instructions
Gather Supplies
- nail clipper or grinder, styptic powder, towel (optional), and plenty of treats.

Gather Supplies Find a Quiet Spot and Prepare Cat
- Find a quiet spot away from distractions. If your cat is squirmy, wrap them in a towel, exposing one paw at a time. Consider an elevated surface like a padded ironing board.
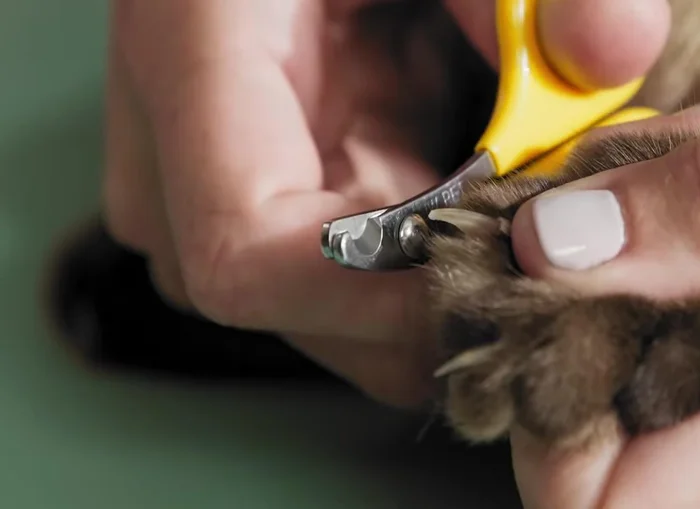
Isolate Nail and Locate Quick
- Isolate the nail, extend it gently, and locate the quick (the pink part of the nail). There's usually space between the nail tip and the quick – that's where you'll cut.
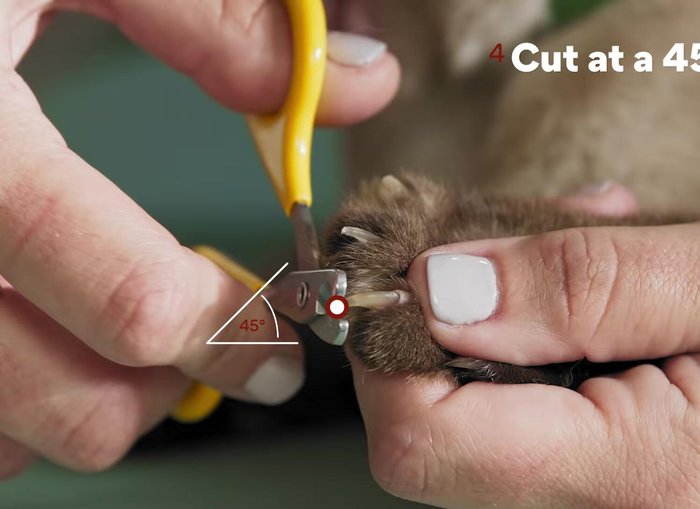
Trim the Nail
- Cut at a 45-degree angle with the clippers facing the end of the nail, trimming only the tip to avoid the quick. Cut cleanly and quickly.
Trim the Nail Trim Gradually and Monitor Cat
- Trim a little at a time. For beginners, just snip the tips. If confident, trim more, keeping a safe distance from the quick. Reward with treats after each nail. Watch for warning signs (tail twitching, body stiffening, growling, panting, excessive purring) and stop if needed.
Trim Gradually and Monitor Cat Handle Accidents
- Be prepared for accidents. If you nick the quick, apply styptic powder to stop bleeding. Only continue if your cat remains calm.
Handle Accidents
Read more: Stress-Free Cat Nail Clipping: The Cat Bag Method
Tips
- Use plenty of treats to keep your cat calm and cooperative.
- A towel wrap can help prevent scratches if your cat is resistant.
- An elevated surface can make the process easier.
- Cut cleanly and quickly to avoid crushing the nail.
- Be patient and trim a little at a time.